How to Recover SD Card Data with Bennse SD Card Recovery
Bennse SD Card Recovery is a data recovery software that can recover data from accidentally deleted or formatted SD cards.
If the following situations occur and data is lost from your SD card, try recovering it with Bennse SD Card Recovery.
Table of contents
1.Main reasons for SD card data loss
- 1. You accidentally deleted data from your SD card or USB memory.
- 2. You formatted your SD card or USB memory.
- 3. When you connect it to your computer, the message "Do you want to format?" appears.
- 4. Your smartphone displays messages such as "SD card is damaged" or "Damaged SD card."
2.Caution when restoring SD cards
1. The sooner you start the restoration, the higher the chance of recovery, so start the restoration process immediately after the data on the SD card is lost.
2. After accidentally deleting or formatting the SD card data, stop using it. The data may be overwritten and become unrecoverable.
By following the steps above, you may be able to recover data that was accidentally deleted or formatted from an SD card or USB memory.
When performing recovery, please also make use of the convenient functions below.
3.How to recover lost SD card data:
STEP 1: Download Bennse SD Card Recovery
First, download and install the "Bennse SD Card Recovery" data recovery software.
After the installation is complete, launch it.
Bennse SD Card Recovery Free Download Link: Bennse SD Card Recovery
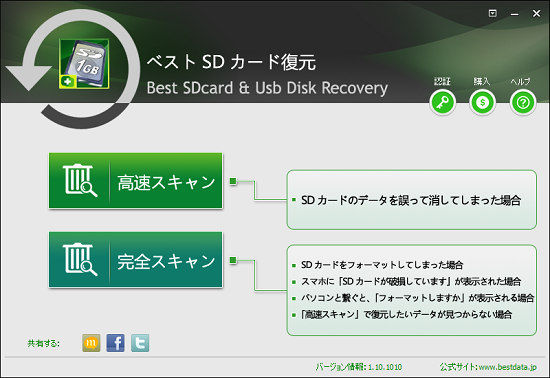
STEP 2: Select recovery mode
Bennse SD Card Recovery also has two recovery modes: "Fast Scan" and "Full Scan".
If you accidentally delete data from your SD card, you can use "Fast Scan" to quickly detect and recover data.
If you have formatted your SD card or USB memory, search for "Full Scan".
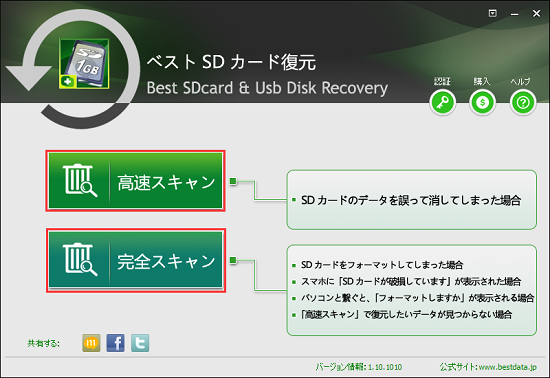
STEP 3: Specify the media to restore
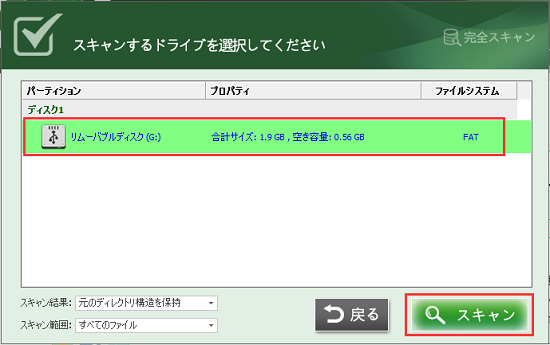
To restore an SD card data, first connect the SD card or USB memory you want to restore to your computer.
When the computer successfully recognizes it, "Removable Disk" will be displayed.
Specify "Removable Disk" in Beense SD Card Recovery and click the "Scan" button at the bottom right.
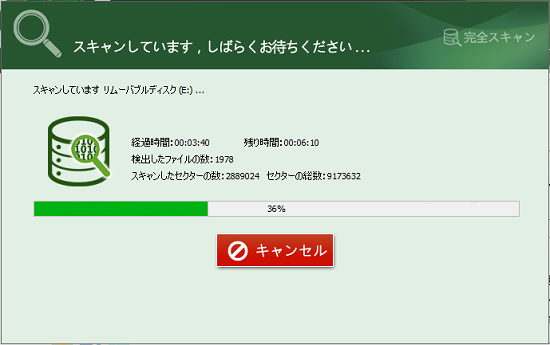
After the scan starts, the following screen will be displayed. You can check the number of files found and the time required for the search.
STEP 4: Check and restore the recovered data
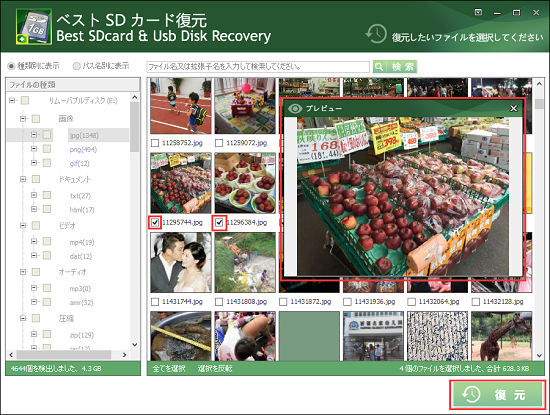
After the scan is complete, a list of detected files will be generated. A file preview function is provided, so you can preview the files and check their contents. Check the files you want to restore and click the "Recover" button at the bottom right.
STEP 5: Set the restore destination
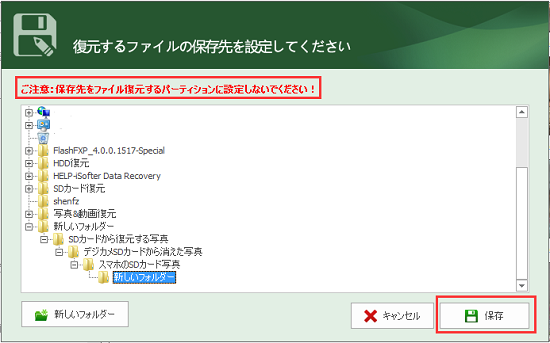
Finally, set the location to save the restored files.
You must set the restore destination to a location other than the source SD card or USB memory.
Once the restoration is complete, the window below will be displayed.
Open the destination folder you just set and check whether the data from the SD card you wanted to restore has been successfully restored.

Other useful features
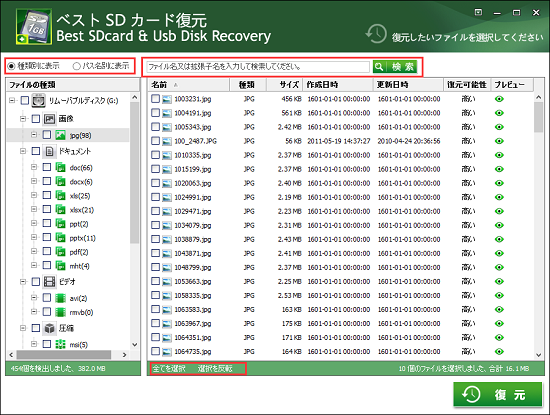
1.You can also select the display mode "Show by type" or "Show by path name" from the list on the left to display the detected files clearly.
2.You can search by entering the file name or extension name. You can quickly find the files you want to restore from the scan results.
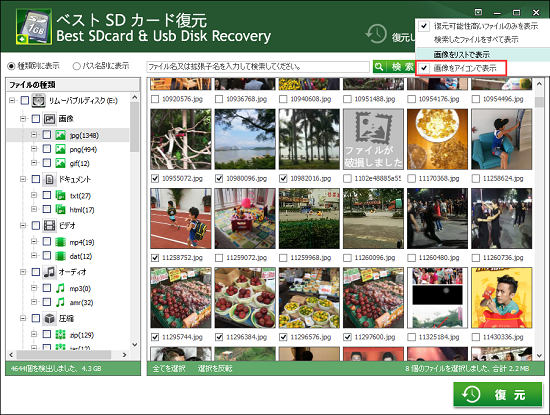
3. Detected image files can be displayed in two ways: list and icon. When displayed as icon, you can check the contents of the image file directly without previewing.
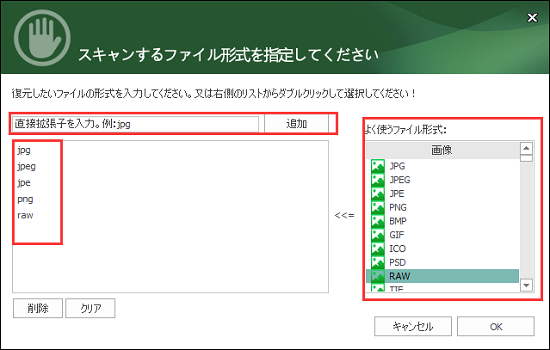
4. You can also specify the "scan range". By scanning only the specified files, you can greatly improve the recovery efficiency.
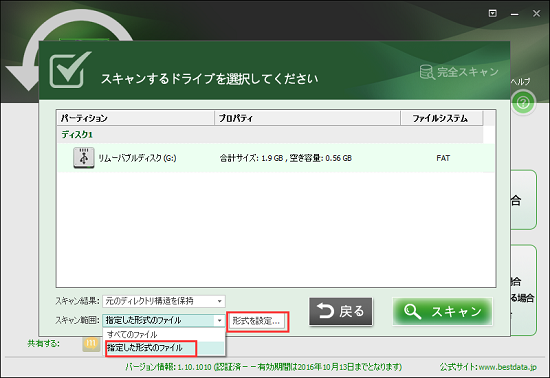
You can specify the file format to scan by directly entering the extension name or double-clicking the frequently used file format from the list on the right.
Last updated: December 13, 2024
- Products
-
Data RecoveryVideo ConvereterVideo Maker
sd card recovery | MP4 compression | MP4 to MP3 Converter | MP4 Converter | PhoneRescue for iOS | phonerescue for android | Anytrans
Terms of Use | Privacy Policy | Contact Us | Link | Sitmaps
Copyright ©2024iSofter Co.,Limited All rights reserved.
